Access Denied
IMPORTANT! If you’re a store owner, please make sure you have Customer accounts enabled in your Store Admin, as you have customer based locks set up with EasyLockdown app. Enable Customer Accounts
Custom Planters

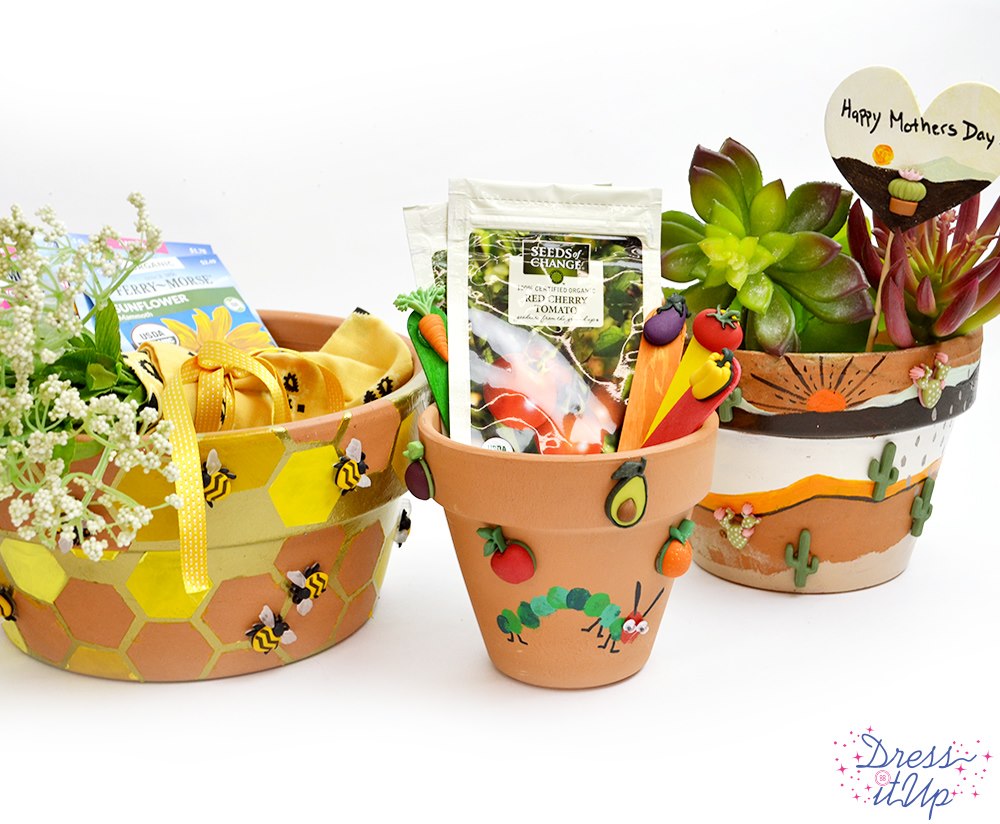
Mother's Day is just around the corner, and what better way to show appreciation than with a heartfelt, handmade gift? This year, skip the store-bought gifts and create something special that your mom will cherish—a beautifully hand-painted flower pot filled with her favorite plants or flowers. In this blog post, we'll guide you through the steps to create your own personalized hand-painted flower pots that are perfect for Mother's Day.
What You'll Need:
Terracotta flower pots in various sizes
Acrylic paints (assorted colors)
Paintbrushes in different sizes
Pencil
Painter's tape (optional)
Clear acrylic sealer spray
Potting soil
What You'll Need:
Terracotta flower pots in various sizes
Acrylic paints (assorted colors)
Paintbrushes in different sizes
Pencil
Painter's tape (optional)
Clear acrylic sealer spray
Potting soil
Dress It Up embellishments of your choice
Plants or flowers of your choice
Plants or flowers of your choice
1. Clean and Prepare the Flower Pots: Start by cleaning the terracotta flower pots with water and a mild soap to remove any dust or dirt. Once they are dry, you can begin painting.
2. Sketch Your Design: Using a pencil, lightly sketch your design onto the flower pot. If you're not confident in your drawing skills, you can also use stencils or trace a design onto the pot.
3. Paint the Base Coat: Choose a base color for your flower pot and paint the entire pot with this color using a paintbrush. Allow the paint to dry completely before moving on to the next step.
4. Add Details and Patterns: Once the base coat is dry, use smaller brushes to add details, patterns, or any other designs to your flower pot. You can get creative here—think floral patterns, geometric shapes, or even personalized messages.
5. Use Painter's Tape for Clean Lines (Optional): If you want clean lines between different colors or sections of your design, use painter's tape to mask off areas before painting. This will help you achieve a neat and professional-looking finish.
6. Seal the Paint: After the paint has dried completely, apply a coat of clear acrylic sealer spray to protect the paint from chipping or fading over time. Make sure to follow the instructions on the sealer spray for best results.
6. Seal the Paint: After the paint has dried completely, apply a coat of clear acrylic sealer spray to protect the paint from chipping or fading over time. Make sure to follow the instructions on the sealer spray for best results.
7. Glue on Embellishments: After the paint sealant has dried, it is time to make these pots extra special with Dress It Up embellishments. Cut the plastic shanks off the buttons and use a strong adhesive to attach them to your painted pots. Let glue dry
8. Plant Your Flowers: Once the glue has dried, fill the painted flower pot with potting soil and plant your chosen flowers or plants. Make sure to water them according to their specific care instructions.
Tips and Tricks: Choose Plants Wisely: Consider your mom's gardening skills and the amount of sunlight the pot will receive when choosing plants or flowers.
Creating a hand-painted flower pot is not only a fun and creative project but also a thoughtful gift that your mom will love. Whether she's an avid gardener or just appreciates handmade gifts, she's sure to cherish this personalized Mother's Day gift for years to come. So, gather your materials, unleash your creativity, and make this Mother's Day extra special with a DIY hand-painted flower pot!
Kelly Smith
|
Publicado el 16 abril 2024
Más mensajes
Invalid password
Enter